This guide will walk you through the steps needed to set up WordPress Auto Posting. Follow the instructions below:
1. Site URL
Enter the URL of the WordPress site where you want to auto post your articles. It usually looks like this: https://example.com
2. Username
This is the username you use to log in to your WordPress site. If you do not have a username, you can create one by going to your WordPress dashboard -> Users -> Add New.
3. Password
We require an application password for posting articles. To generate an application password, follow the steps below:
Step 1# Log in to your WordPress site’s dashboard.
Step 2# Navigate to Users -> Your Profile.
Step 3# Scroll down to the Application Passwords section.
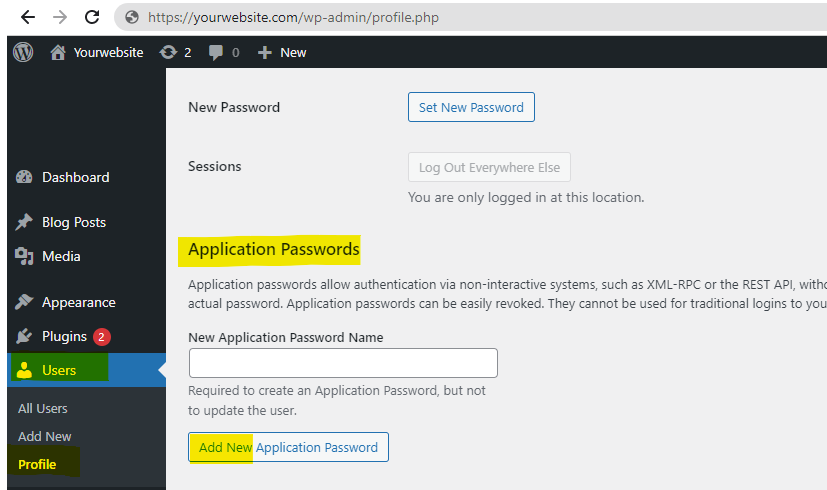
Step 4# Enter a new application password and click on Add New.
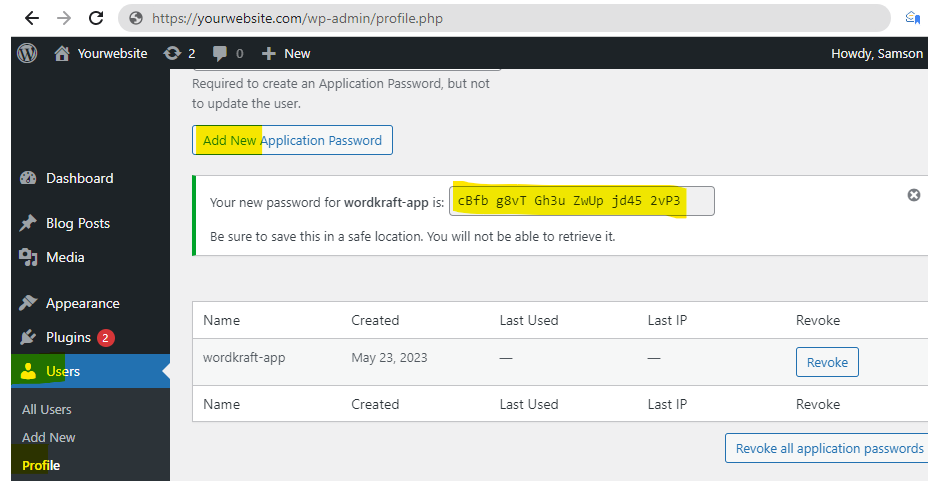
Step 5# You will now see a new password generated. Copy this password and use it for the WordPress Auto Posting.
4. Feature Image
Upload an image that you want to set as the featured image for your post.
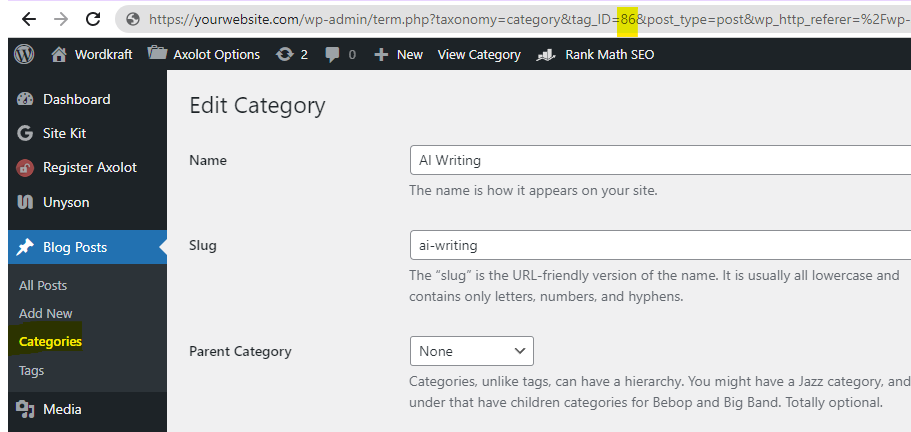
5. Category ID
Enter the ID of the category under which you want to post your article. You can find the Category ID in your WordPress dashboard -> Posts -> Categories.
6. Status
Select the status of the post. You can choose between ‘Draft’ for saving the post to edit and publish later, and ‘Publish’ for immediately publishing the post on your site.
Security Note:
Please remember, we do not save any of your credentials. Every time you post an article, you will have to enter your username and password. We respect your privacy and are committed to maintaining the security of your data.